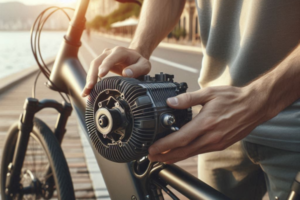
🔧 Why Coastal Environments Threaten Your E-Bike Motor
Living near the coast offers breathtaking views and invigorating rides, but it also presents unique challenges for electric bicycle owners. The combination of high humidity, salty air, and sudden weather changes can accelerate corrosion, particularly affecting the motor—the heart of your e-bike.
Salt particles suspended in the air, coupled with ambient moisture, can infiltrate small openings around motor housings and cable joints. Even well-sealed systems may become vulnerable over time, especially without additional protective measures.
Proper sealing is a cost-effective strategy to prevent long-term damage and maintain reliability in harsh coastal conditions. By reinforcing vulnerable areas, you can ensure consistent performance and extend the lifespan of your electric bike.
🧠 Mini Case: A Lesson from the Shore
Carlos, an avid cyclist from a coastal town, noticed his e-bike’s performance declining after a few months. Despite regular cleaning, he hadn’t considered the impact of salty air seeping into the motor housing. A professional inspection revealed corrosion in the connectors, leading to costly repairs. This experience underscores the importance of proactive sealing to protect against unseen environmental threats.
⚖️ Visual Comparison: Sealed vs. Unsealed Motors
| Aspect | Sealed Motor | Unsealed Motor |
|---|---|---|
| Exposure to Moisture | Minimized | High |
| Risk of Corrosion | Low | High |
| Maintenance Frequency | Reduced | Increased |
| Overall Longevity | Extended | Shortened |
💡 Insight: Just as a raincoat shields you from the elements, proper sealing safeguards your e-bike’s motor from the corrosive coastal environment.
🛠️ Where Moisture Gets In: Vulnerable Points on Your E-Bike Motor
Even the most well-engineered electric bicycle motors have vulnerable areas—small gaps and interfaces where humidity and salt can silently invade. Understanding where these weak points are and how to reinforce them properly is essential to ensure your sealing efforts are effective.
Most riders assume that once a motor is enclosed in a waterproof casing, it’s fully protected. Unfortunately, this is rarely the case in coastal climates. Environmental exposure slowly wears down seals, expands tiny openings, and introduces salt particles that begin to accumulate where you least expect them.
🔍 Key Vulnerable Areas to Watch
- Motor-Cable Interfaces: Where cables exit the motor housing is one of the first points salt can sneak in.
- Battery Connection Ports: Especially if the seal is rubber-based and aging or dry.
- Charging Port: Often covered by a small flap, this area is easy to forget—but critical to protect.
- Controller and Sensor Joints: Even if hidden, these can absorb moisture via vibrations or hairline cracks.
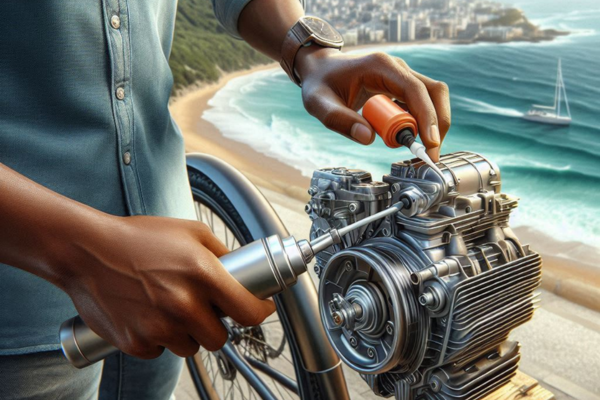
🧪 Recommended Sealing Materials
Choosing the right sealant is crucial. While household silicone may seem tempting, it may not provide the proper flexibility or adhesion needed for e-bike components. Instead, look for products formulated for electronics or marine applications. Here are a few common options:
- Silicone Conformal Coating: Ideal for PCB surfaces and internal connections. Only use if disassembly is possible and you know what you’re doing.
- Dielectric Grease: Excellent for plug-in connectors; it prevents water ingress without affecting conductivity.
- Flexible Rubber Sealing Tape: Great for wrapping around external cable joints and connectors.
✅ Pro Tip: Never apply sealing compounds directly onto moving parts or ventilation holes. Sealing should protect, not suffocate your motor.
📅 How Often Should You Reseal?
The frequency of resealing depends on the conditions your bike faces. For coastal areas with constant humidity and salt air:
- Monthly: Reapply dielectric grease to connectors after heavy rain or frequent fog.
- Every 3 months: Inspect and rewrap any rubber sealing tape.
- Every 6 months: Full inspection of cable joints and controller areas.
🔄 Think of Your Motor Like a Submarine Hatch
Just like a submarine’s safety depends on the strength of its hatch seals, your motor depends on how tightly and consistently it’s sealed against external elements. One overlooked joint or a worn-out rubber cover can turn into a vulnerability over time.
💡 Inspiration: The ocean is powerful—but so is preparation. When your motor is sealed with care, you ride with peace of mind.
⚠️ Common Mistakes in Sealing E-Bike Motors — and How to Avoid Them
Sealing your e-bike motor might sound simple—just cover up the gaps, right? But in reality, poor sealing can sometimes be worse than no sealing at all. When applied incorrectly, sealants may trap moisture, degrade faster, or block critical ventilation points. Many riders, with the best intentions, unknowingly create long-term problems by making common mistakes in their sealing routines.
Avoiding these errors requires a good understanding of your bike’s architecture, the properties of sealing materials, and how weather affects your components over time. Below, we break down the most frequent sealing mistakes—and exactly how to fix or avoid them. 🛑
🚫 Mistake #1: Using the Wrong Products
Household silicone or generic waterproof glue might seem like an easy fix, but these products can crack with vibration or lose adhesion in extreme temperatures. Worse, some harden into a brittle shell, creating channels where water can accumulate and get trapped inside.
🚫 Mistake #2: Sealing Over Dirty or Wet Surfaces
Applying sealants to moist or dusty connectors can prevent them from bonding correctly. Always clean the surface with isopropyl alcohol and let it dry fully before applying any grease, tape, or coating. A rushed job can lead to peeling or bubbles—both of which expose the motor to moisture.
🚫 Mistake #3: Blocking Ventilation Channels
Some e-bike motors use passive ventilation or heat dissipation through specific metal panels or slits. Accidentally covering these with rubber tape or excessive sealant can cause overheating and degrade performance over time. Always consult your bike’s manual or a trusted technician to locate ventilation zones before sealing.
📊 Quick Table: Mistakes and Better Alternatives
| Mistake | Why It’s a Problem | Better Approach |
|---|---|---|
| Generic silicone | Cracks or shrinks over time | Use flexible marine-grade sealants |
| Sealing dirty connectors | Prevents bonding and traps moisture | Clean and dry with isopropyl alcohol first |
| Oversealing air vents | Blocks heat dissipation | Identify and leave vents exposed |
📋 Checklist: Am I Sealing My Motor Properly?
- ☐ I use electronics-safe, flexible sealing products
- ☐ I clean and dry all surfaces before sealing
- ☐ I avoid covering motor ventilation zones
- ☐ I inspect all seals every 2–3 months
- ☐ I reapply sealant after heavy rain exposure
💡 Pro Tip: When in doubt, apply less—not more. A precise seal is better than a messy overcoat that blocks airflow or traps salt.
Sealing should enhance your bike’s defenses, not compromise them. The more care you put into doing it right, the fewer worries you’ll have when riding through mist, drizzle, or a coastal breeze.
💡 Reflection: Good sealing is quiet protection. You may not see it working—but you’ll definitely feel the difference when the motor stays strong, no matter the weather.
🔄 Routine Seal Inspection: Keeping Protection Active Over Time
Even the most precise sealing job can fail over time without regular inspection. Coastal humidity, sun exposure, vibrations from daily use, and salt carried in the air slowly wear down protective layers. That’s why routine seal maintenance is essential—especially if you ride often or store your e-bike outdoors.
Fortunately, a simple monthly check can catch most issues before they escalate. And with the right tools and habits, you don’t need to rely on a mechanic to keep your e-bike’s defenses strong. Let’s break down what to inspect, how often, and what tools will make the process faster and easier.
🧭 Where to Look During Seal Inspections
- Connector Entry Points: Inspect around where motor cables, sensor wires, and battery cables connect to the housing. Look for cracks or dried sealant.
- Rubber Seals and Grommets: Gently press on these—if they feel brittle, dry, or cracked, they’ve lost their effectiveness.
- Controller and Charging Port: These are common access points for moisture, especially if the port covers are worn or loose.
- Tape-Wrapped Areas: Check for peeling, discoloration, or residue buildup that indicates water intrusion or salt deposits.
🛠️ What You’ll Need
You don’t need a mechanic’s toolbox—just a few affordable items can make your inspection routine quick and easy:
- 📌 Microfiber cloth: To clean away dirt and moisture before inspection
- 🔦 Small flashlight: To spot hidden cracks or white powder from salt
- 👀 Magnifying glass: Optional, but helpful for spotting hairline splits
- 🧴 Isopropyl alcohol spray: To clean around seals safely
💡 Smart Habit: Add your seal inspection to your calendar—once a month, or right after riding through heavy fog or rain. A 10-minute check can prevent $200 in repairs.
📅 Suggested Inspection Schedule
| Action | Frequency | Notes |
|---|---|---|
| Quick visual check of cable seals | Weekly | Look for debris or salt buildup |
| Full seal inspection with flashlight | Monthly | Wipe and inspect all rubber/tape joints |
| Dielectric grease reapplication | Every 2 months | Especially after rain or salty air exposure |
🧘♀️ Simple Reminder: A Calm Habit Pays Off
You don’t need to overhaul your routine. Think of seal inspection like checking tire pressure or topping up your water bottle. A simple glance, a quick wipe, and a bit of care can keep your motor performing like new—even when coastal humidity is at its worst.
💡 Reflection: The best defense is quiet and consistent. Check your seals like you check your breath—naturally, and with care.
💬 Frequently Asked Questions (FAQs) About Motor Sealing
Can I apply sealant to all visible gaps around my motor?
Not always. While it’s important to seal vulnerable areas, avoid covering ventilation zones or expansion joints. These allow the motor to release heat or adjust to pressure changes. Focus on cable entry points, battery ports, and connectors instead.
How do I know if my current sealing has failed?
Look for signs like brittleness, peeling, discoloration, or white salt residue around joints. Also, be alert for performance changes—slight electrical delays or reduced battery life could mean moisture is affecting the system internally.
What kind of grease or coating should I use for connectors?
Use a non-conductive dielectric grease specifically made for electronic connectors. This helps block moisture while maintaining signal quality and avoiding corrosion.
Do factory-sealed motors still need extra sealing?
Yes—especially in coastal or tropical climates. Factory sealing is a good baseline, but it’s not always designed to withstand daily exposure to salt and humidity. Reinforcing these areas improves resilience significantly.
💖 Final Thoughts: The Strength in Subtle Protection
We often celebrate the flashy upgrades—bigger batteries, stronger brakes, faster motors. But sometimes, the quietest modifications bring the greatest rewards. Sealing may be invisible to the eye, but its impact echoes through every ride you take.
By taking the time to care for your motor, you’re doing more than protecting a machine. You’re preserving your freedom, your independence, and your choice to move through the world with intention. Whether you ride through ocean breeze or morning fog, your preparation empowers you to go further, with confidence.
Proper sealing doesn’t shout—it shields. It gives you the gift of peace, of knowing your e-bike will respond when you need it most. That’s not just maintenance—it’s love in motion. 💙
💡 Inspiration: A motor that breathes easy lets you ride free. Seal it right, and it will carry you through anything.
🌎 Join the Conversation: How Do You Seal Against the Sea?
Do you live in a coastal or humid area? Have you found a sealing method that works wonders—or made a mistake that taught you a valuable lesson? Your story could help someone else protect their motor and ride more confidently.
We’d love to hear from you: 💬 What tools or products do you trust for sealing? 🧠 How often do you inspect your bike’s protective layers? ✨ What’s the one tip you’d give to a new coastal rider?
Share your thoughts in the comments and help us build a strong, smart, and supportive e-bike community. Because together, we ride stronger—and smarter. 🚴♀️💬🌊