💨 Why Aerodynamics Matter for E-Bike Riders
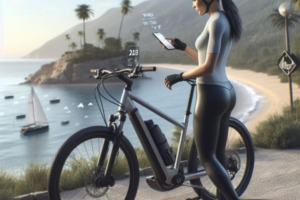
When people think about improving an e-bike, they often jump straight to upgrading the battery, motor, or even the tires. But one of the most overlooked factors in electric bicycle performance is wind resistance. As riders reach higher speeds—often between 20–28 km/h (12–17 mph)—aerodynamics begins to play a dominant role in energy efficiency. This is especially true in coastal environments or open areas where wind becomes a persistent challenge.
Unlike traditional bicycles, where rider effort determines how hard the wind feels, e-bikes blend physical input with motor assistance. That means any reduction in drag directly improves your ride—not just by increasing speed but also by conserving battery power and enhancing stability. Enter: aerodynamic components. These add-ons and modifications can reshape how air flows around your bike and body, helping you ride smarter with less resistance.
🌬️ What Is Aerodynamic Drag and Why Should You Care?
Aerodynamic drag is the force that resists your movement as you ride forward. It increases exponentially with speed, meaning that going just a little faster requires a lot more energy—unless you reduce how much air hits your bike and body. The higher your speed, the more critical aerodynamics becomes.
- At 15 km/h: Wind resistance is minimal, but still present.
- At 25 km/h: Wind resistance becomes the primary force working against you.
- At 30+ km/h: Even small aerodynamic improvements can result in big performance gains.
For e-bike riders—especially those who commute, tour, or ride in exposed areas—installing the right aero components can improve handling, conserve battery life, and reduce physical fatigue. It’s not just about speed—it’s about efficiency.
🔧 Types of Aero Components for E-Bikes
Aerodynamic components are designed to either reduce the drag created by the bike itself or help streamline the rider’s posture and profile. Here are some of the most common categories:
- Aero handlebars: Reduce the rider’s upper body exposure and encourage a more compact position.
- Wheel covers or deep rims: Improve airflow over the wheels and reduce turbulence.
- Aero seatposts and saddle shapes: Create smoother transitions between the frame and rider’s body.
- Integrated lights and cables: Eliminate protrusions that cause drag.
- Fairings and body panels (on cargo or commuter e-bikes): Streamline bulkier frame sections.
📊 Impact of Aerodynamic Improvements on E-Bike Performance
| Component | Estimated Drag Reduction | Battery Efficiency Gain |
|---|---|---|
| Aero handlebars | Up to 10% | +5–8% range on flat rides |
| Wheel covers | 6–8% | +3–5% efficiency |
| Frame-integrated lighting/cabling | 2–4% | Minor, but improves airflow consistency |
🧠 Who Benefits Most from Aero Components?
While every rider can gain something from better aerodynamics, certain profiles will benefit more than others:
- Commuters: Reduce daily energy use and ride time, especially in windy conditions.
- Touring riders: Maximize battery life on long rides through variable terrain.
- Coastal riders: Combat headwinds and crosswinds for better control and comfort.
- Cargo e-bike users: Offset added bulk with fairings and streamlining panels.
💡 Insight: You don’t have to race to care about aerodynamics. Every e-bike ride is smoother when you ride with the wind—not against it.
🛠️ Which Aero Components Are Worth Installing on Your E-Bike?
Aerodynamic components vary widely in cost, complexity, and effectiveness. Some upgrades offer immediate and measurable benefits, while others are more situational or aesthetic. To make smart decisions as a rider, it’s essential to know which parts provide real-world gains—and when to prioritize them. Below, we explore each major category and how it applies to different riding conditions.
🔩 1. Aero Handlebars: Better Posture, Less Wind Resistance
Handlebars are often overlooked, yet they significantly influence your riding posture and upper-body profile. Aero bars are designed to reduce frontal exposure by encouraging a more compact position, lowering your shoulders and elbows to align with airflow.
- Pros: Improves airflow over the rider’s body, especially at higher speeds; enhances control during headwinds.
- Cons: May reduce upright visibility and comfort for casual riders; installation may require stem adjustments.
- Recommended for: Touring, commuting, and flat-terrain riders aiming to improve range and comfort.
💨 2. Wheel Covers and Deep-Rim Wheels
The rotating wheels of a bike are a major source of turbulence. Adding aero covers or switching to deep-section rims can smooth airflow and reduce resistance—especially at speeds above 25 km/h.
- Pros: Reduces turbulence and drag; improves stability at speed and in headwinds.
- Cons: Can be affected by crosswinds; heavier wheels may reduce acceleration responsiveness.
- Recommended for: Consistent-speed riders and e-bikes used on long flat routes.
🪛 3. Frame-Integrated Cabling and Lights
Exposed wires, headlights, and accessories may seem small, but collectively they disrupt airflow. Integrating cables inside the frame and choosing flush-mounted lights can reduce visual clutter and resistance.
- Pros: Cleaner appearance and slightly smoother airflow; reduced drag in front-facing zones.
- Cons: Often limited to high-end bikes or custom modifications; minimal performance difference.
- Recommended for: Riders seeking visual streamlining and marginal efficiency gains.
📦 4. Fairings and Cargo Aerodynamics
For cargo or utility e-bikes, wind drag is amplified by the size and shape of rear carriers or front baskets. Installing fairings, wind-deflecting shields, or tapered storage boxes can reduce this drag and improve energy use on longer rides.
- Pros: Significant drag reduction for bulky bikes; smoother airflow over gear and frames.
- Cons: Adds weight and may complicate maintenance access; aesthetics vary widely.
- Recommended for: Delivery, commuting, and touring riders with extra cargo or panniers.
📊 Comparison Table: Effectiveness vs. Investment
| Component | Impact on Drag | Installation Difficulty | Cost Range |
|---|---|---|---|
| Aero handlebars | Medium to High | Medium | $50–$150 |
| Wheel covers | Medium | Low | $40–$100 |
| Integrated lights/cables | Low | High (often factory-equipped) | $100–$300+ |
| Fairings | High (for cargo bikes) | Medium | $60–$200 |
💡 Reminder: The most effective upgrades aren’t always the most expensive—they’re the ones that match your riding style and conditions.
🚴♀️ Real-World Scenarios: When Aero Components Truly Make a Difference
Installing aerodynamic components isn’t just about theory—it’s about impact in the real world. For many riders, these upgrades have transformed the way they experience everyday routes, manage energy, and respond to environmental challenges like wind, distance, or terrain. In this section, we explore real-life scenarios based on rider types, goals, and conditions to help you determine whether aero components are worth it for you.
🧳 Scenario 1: The Coastal Commuter Battling Crosswinds
Laura rides 12 km to work each day along a coastal trail. The route is scenic but constantly exposed to wind from the sea. Initially, her upright posture and loosely packed backpack made her unstable during gusts, increasing drag and fatigue. She installed aero handlebars and streamlined her backpack setup with a tapered pannier.
- 🔧 Upgrades made: Aero drop bars, rear rack with hard-shell pannier
- ⚙️ Results: Increased stability and improved average speed by 9%
- 🔋 Battery range improvement: Up to 6% more on windy days
Laura now rides more confidently and notices fewer wobbling moments when encountering crosswinds, especially near open stretches by the ocean.
🏙️ Scenario 2: The Urban Commuter Seeking Speed and Style
David lives in a dense urban area with lots of stop-and-go traffic. He’s a design-conscious rider who wanted a cleaner-looking bike without cables and bulky accessories sticking out. Instead of chasing speed, he focused on reducing drag in short bursts between intersections.
- 🔧 Upgrades made: Frame-integrated lights, internal cabling, slim LED turn signals
- ⚙️ Results: Reduced front-end clutter and improved visual appeal
- 🌬️ Wind efficiency: Minor but noticeable during morning gusts
David’s ride feels smoother, and he reports needing less effort to accelerate after red lights, especially on breezy spring mornings.
🏔️ Scenario 3: The Weekend Rider Tackling Open Trails
Carlos rides for leisure on the weekends through wide, open countryside routes with little tree cover. He often noticed how wind would slow him down or push against his loaded cargo bike, particularly during long stretches. To improve his ride, he installed full wheel covers and added a front fairing to deflect wind.
- 🔧 Upgrades made: Aero wheel covers, adjustable polycarbonate front fairing
- ⚙️ Results: Decreased effort on flat terrain and better handling on descents
- 🔋 Battery life: Increased average range by 8–10% on windy rides
Carlos says he now looks forward to windy days because he knows his setup works with the wind, not against it.
📦 Scenario 4: The Delivery Rider with a Cargo Load
Maya uses a cargo e-bike for deliveries in a medium-sized coastal city. Her boxy rear cargo and front basket created significant drag, making it harder to ride in coastal headwinds. She installed rear and front fairings to channel airflow around the cargo.
- 🔧 Upgrades made: Rear pannier fairings, acrylic basket wind deflector
- ⚙️ Results: More stable steering, easier starts, and faster return trips
- 📦 Time saved: 10–15 minutes on multi-stop delivery routes
Her daily work feels less physically demanding, and she says it has made her deliveries more consistent—regardless of the wind forecast.
🧠 What These Cases Teach Us
These real-world examples show that aero components don’t just improve performance—they solve everyday problems. Whether you’re fighting wind, carrying loads, or simply seeking comfort, matching your upgrades to your terrain and goals leads to real gains.
💡 Insight: The best upgrades don’t just make you faster—they make your ride feel smoother, smarter, and more enjoyable.
🧾 Should You Invest in Aero Components? A Practical Checklist
Not every e-bike rider needs a full aero overhaul. In fact, the best upgrades are the ones that align with your riding goals, environment, and budget. Before spending time and money on modifications, take a moment to assess your needs using this rider-focused checklist. This will help you decide what’s worth it—and what can wait.
✅ Quick Assessment: Is Aero Worth It for You?
- ✔️ Do you regularly ride at speeds over 20 km/h (12 mph)?
- ✔️ Do you experience strong headwinds or sidewinds on your route?
- ✔️ Is your average commute longer than 8–10 km per day?
- ✔️ Do you want to extend battery life and improve range?
- ✔️ Do you carry cargo that increases your bike’s wind profile?
- ✔️ Do you ride in coastal, open, or hilly terrain regularly?
If you answered “yes” to at least three of these questions, then aerodynamic upgrades could offer meaningful improvements to your performance, comfort, or efficiency.
🔍 Aero Investment Decision Table
| Rider Type | Recommended Components | Justification |
|---|---|---|
| City Commuter | Aero handlebars, integrated lights | Reduces frontal exposure and improves ride comfort |
| Coastal Rider | Wheel covers, fairings, compact panniers | Combat strong wind drag and improve stability |
| Cargo/Delivery Rider | Rear and front fairings, tapered storage | Streamlines bulky gear and improves range |
| Recreational Weekend Rider | Aero bars, windproof clothing | Enhances leisure ride experience in breezy terrain |
💰 Budgeting Tip: Upgrade by Priority
You don’t need to buy everything at once. Start with the component that offers the biggest aerodynamic gain for your specific needs:
- Step 1: Improve rider posture through handlebars or adjustable stems.
- Step 2: Add wheel covers or upgrade to deeper rims if you ride at steady speeds.
- Step 3: Streamline storage with compact or tapered cargo solutions.
- Step 4: Consider fairings only if your bike carries noticeable wind-catching loads.
🧠 Technical Notes: What to Avoid
- ❌ Avoid bulky add-ons that negate aerodynamic gains (e.g., large baskets with no deflectors).
- ❌ Don’t install deep-rim wheels if you frequently face strong crosswinds—they may destabilize steering.
- ❌ Don’t compromise comfort for aero—if your new posture causes discomfort, it won’t be sustainable.
🎯 Final Strategy: Smart Upgrades, Smarter Riding
Aerodynamics isn’t just about speed—it’s about using the environment and your equipment efficiently. Riders who evaluate their needs and install components with intention consistently report smoother, quieter, and more comfortable rides. Let your upgrades match your reality.
💡 Insight: True efficiency begins before the ride starts—when you choose upgrades that reflect how, where, and why you ride.
💬 Frequently Asked Questions (FAQs)
1. Are aero components really effective for everyday e-bike riders?
Yes. While originally designed for racing cyclists, many aerodynamic components now benefit regular e-bike riders. Reducing drag helps conserve battery power, improve handling in windy conditions, and enhance comfort—especially at higher commuting speeds or on long rides.
2. Will aero components make me noticeably faster?
In many cases, yes—especially if you ride above 20–25 km/h. Even minor improvements in posture and airflow can increase your average speed by 1–3 km/h, reduce strain, and extend battery range by 5–10%, depending on terrain and wind.
3. Are these components difficult to install?
Most upgrades—like wheel covers, aero handlebars, and pannier fairings—are relatively simple to install with basic tools or a quick visit to a local shop. Some components, like frame-integrated cabling, may require more technical support or be available only on factory-equipped models.
4. Can I combine comfort with aerodynamics?
Absolutely. The best setups balance comfort and efficiency. Look for ergonomic handlebars that encourage better posture without compromising wrist or back health, and choose clothing or cargo designs that reduce drag while allowing mobility.
5. What’s the most cost-effective aero upgrade?
Handlebars and wheel covers tend to offer the best cost-to-impact ratio. They’re affordable, widely available, and can provide both aerodynamic and ergonomic improvements without altering the bike’s core structure.
💖 Final Thoughts: Efficiency Is More Than Speed
Every ride tells a story—not just of where you go, but how wisely you got there. Installing aerodynamic components isn’t just about going faster—it’s about going further with less effort, riding smoother in the face of wind, and turning every journey into a confident, calculated experience.
Whether you’re a commuter navigating gusty avenues, a coastal rider greeting the sea breeze, or a delivery professional powering through your daily route, choosing the right aerodynamic upgrades transforms how you connect with your e-bike—and with the world around you.
💡 Inspiration: Aerodynamics isn’t just science—it’s the art of riding with intention.
🌍 Join the Conversation: What Aero Upgrades Have Worked for You?
Have you installed any aerodynamic components on your e-bike? Did you notice a change in comfort, speed, or battery range? Are you considering your first upgrade and unsure where to begin? Let’s share insights and help each other ride smarter.
Drop a comment below and tell us:
🔧 What component made the biggest difference for you?
🌬️ What’s your biggest aerodynamic challenge when riding?
🚴♀️ What advice would you give someone new to aero upgrades?
Together, we’re building more than a blog—we’re building a community of thoughtful, empowered e-bike riders who ride not just to move, but to move better. 🚴♀️💨💡